How to Groom Your Pet at Home Without the Stress
By Team · July 11, 2026
Category: grooming-hygiene

Home grooming feels stressful mostly because you don't know what to expect. A practical, low-stress walkthrough for nail trims, brushing, and bathing your pet at home.
Key takeaways
The problem Home grooming feels overwhelming because most pet owners don't know what to expect and fear accidentally hurting their pet during tasks like nail trims or brushing.
Core insight Pet grooming at home is a learnable skill that improves with practice, and most stress comes from uncertainty rather than the tasks themselves being genuinely difficult.
Practical outcome You can start with short, focused sessions tailored to your pet's coat type, use the right tools, and build tolerance gradually rather than forcing a full groom all at once.
Home grooming your pet sounds simple until you're actually holding the nail clippers, your dog is squirming, and you're second-guessing every move. If that sounds familiar, you're not doing it wrong — you're just new at it. Pet grooming at home is a learnable skill, not a natural talent, and most of the stress comes from not knowing what to expect rather than anything being genuinely difficult.
Why Home Grooming Feels Overwhelming (and Why It Doesn't Have to Be)
The friction is real and it's worth naming. Your pet may get anxious the moment you bring out a brush. You might not be sure how hard to press, which direction to go, or whether that lump you just felt is normal. The fear of accidentally hurting them is legitimate — a nicked quick on a nail trim bleeds more than you'd expect and nobody wants to cause pain to an animal they love.
Professional groomers have something you don't yet have: a controlled environment built around the task, years of handling experience across hundreds of different animals, and tools that cost more than most people spend on their own haircuts. That's not meant to discourage you — it's meant to be honest about what you're actually working with at home. You're learning on the job, and that takes a little more time.
But learnable is the right word. One owner who started trimming her terrier's nails at home described the first session as a near-disaster — the dog pulled back, she stopped halfway through one paw, and they both ended up stressed. By the second session she had treats lined up, a better grip, and a much calmer dog. By the fourth session, it took ten minutes and her dog barely flinched. That's not unusual. That's the curve.
Understanding Your Pet's Grooming Needs by Coat Type

Not all pets need the same grooming schedule, and a big part of reducing stress is understanding what your specific animal actually requires — rather than following generic advice.
Short-haired dogs and cats need brushing once or twice a week, mainly to remove dead hair and distribute skin oils. Skip it for a few weeks and you'll notice more shedding on your furniture, but the consequences are mostly cosmetic. Long-haired breeds are a different story. A golden retriever or Maine Coon that misses regular brushing will develop mats — tangles that pull on the skin, trap moisture, and create the right conditions for irritation or infection. What started as a skipped brushing session can become a vet visit for skin problems. That's the chain you want to interrupt early.
Curly-coated dogs like poodles and doodles require more frequent brushing — often every two to three days — because their coat type tangles easily and doesn't shed the way straight coats do. Wiry-coated breeds like many terriers have their own rhythm and often benefit from a technique called hand-stripping, which most owners skip in favor of clipping (that's fine for pets, just not for show dogs).
Here's a quick reference baseline by coat type:
Short-haired (Labrador, Siamese): brush weekly, bath every 4–6 weeks, nail trim every 3–4 weeks
Long-haired (Golden Retriever, Persian): brush every 2–3 days, bath every 4 weeks, nail trim every 3 weeks
Curly or wavy (Poodle, Labradoodle): brush every 1–2 days, professional trim every 6–8 weeks, bath every 3–4 weeks
Wiry (Jack Russell Terrier, Border Terrier): brush weekly, bath every 4–6 weeks, nail trim every 3–4 weeks
Double-coated (Husky, German Shepherd): brush 2–3 times weekly (more during shedding season), bath every 6–8 weeks
Essential Tools: What You Actually Need (and What You Can Skip)
Grooming aisles are overwhelming. Here's what actually earns its place.
A slicker brush is non-negotiable for most coat types — it's the flat, pin-covered brush that removes loose hair and catches tangles before they become mats. A metal comb is worth having alongside it, particularly for long-haired pets, to check your work after brushing. Nail clippers or a grinder are essential regardless of breed. For long-haired dogs or cats that need trimming around the eyes, paws, or sanitary areas, a pair of blunt-tipped grooming shears will save you a trip to the groomer more often than you'd think. If your dog has floppy ears or your breed is prone to ear issues, a vet-approved ear cleaner rounds out the basic kit.
On quality: cheap clippers are genuinely not worth it. They pull at the hair rather than cutting cleanly, which hurts, frustrates your pet, and makes every future session harder. You don't need professional-grade equipment — mid-range options work well for home use. Expect to spend around $25–50 on a decent pair of nail clippers or a basic grinder, and $20–40 on a slicker brush from a brand with solid reviews. You won't regret the modest upgrade.
The tool makes a real difference. If you're brushing a golden retriever with a basic plastic comb, you'll spend 45 minutes working through the coat and still miss most of the undercoat. Switch to a proper slicker brush followed by an undercoat rake, and the same dog takes 20 minutes, the loose hair actually comes out, and your dog is noticeably more comfortable.
Preparing Your Pet (and Yourself) for the First Session
Set the scene deliberately. Choose a time when your pet is calm — after a walk, after a meal, not during peak energy hours. Use a non-slip surface: a rubber mat on the bathroom floor works fine, or a towel in the bathtub for wash sessions. Have treats within reach before you start, not scrambled for mid-session. If your pet tends to bolt, a helper makes the first few sessions much smoother.
Pay attention to your own state going in. Pets — dogs especially — pick up on tension in your body and voice. If you're nervous and stiff, they read that as a reason to be on alert. One practical way to reduce your own anxiety is to practice the motions first: run the clippers near a stuffed animal to get used to the sound, or practice the brushing motion before your pet is in the room. It sounds silly, but it works. Start with one small task per session rather than a full groom — ears one day, a quick brush the next.
A realistic first session for a cat who's never been brushed might look like this: you brush for two minutes, she gets restless, you stop. That's a win. Next week, three minutes. The week after, five. You're building tolerance, not just completing a task.
Brushing and Deshedding: Technique That Actually Works
Always brush in the direction the coat grows, not against it. The pressure should be firm enough to reach through the top coat and catch loose hair, but gentle enough that you're not dragging the pins across the skin. Short, quick strokes are a common mistake when people are rushing — the brush barely grazes the surface and misses the undercoat entirely. Longer, slower, overlapping strokes do the actual work.
As you go, pay attention to what the brush is telling you. Loose hair releasing easily means you're in the right spot with the right pressure. If the brush catches and pulls, you've hit a mat or you're going against the grain. Slow down, work around the mat gently rather than through it, and if it won't release, a detangling spray and your fingers are more useful than forcing the brush. If you notice redness or the skin looks irritated, stop and reassess before continuing.
Here's the difference technique makes: brushing a Labrador with short, quick strokes because you want to finish quickly means the brush barely touches the undercoat. The dog looks groomed on the surface but the dead undercoat is still there. Switch to longer strokes, work section by section, and you'll pull out a surprising amount of loose coat — and your dog will lean into it.
Bathing Without the Battle: Water, Temperature, and Technique
Lukewarm water is the target — test it on the inside of your wrist the same way you would for a baby's bath. Too cold is shocking and uncomfortable; too hot causes distress and can irritate skin. Keep the water pressure low to medium. A handheld showerhead on the gentlest setting works better than filling a tub and dunking, and never direct a hard spray at your pet's face.
Brush out mats before the bath, not after. Water tightens a mat, making it significantly harder to remove once the coat is wet. Wet your pet from the neck down first — most animals are less bothered by water on their body than on their face and head, so save the face for last and use a damp cloth rather than running water. Shampoo in sections, working it gently into the coat rather than piling it on top. Rinse more thoroughly than you think you need to — soap residue left in the coat is one of the most common causes of post-bath itching and dull coat. Finish with a thorough towel dry, then a low-heat dryer if your pet tolerates it, keeping it moving and at a safe distance.
Nail Trimming: The Task That Scares Most Owners (and How to Master It)
The fear here is mostly about the quick — the blood vessel that runs through the center of the nail. In dogs with light-colored nails, you can see it as a pink shadow inside the nail. In dark nails, you can't see it, which is where most anxiety comes from. The quick grows with the nail if trimming is neglected, which means overgrown nails need to be trimmed gradually over several sessions to push the quick back, rather than cut short all at once.
Clippers are faster and work well if you're confident about where to cut. Grinders (rotary tools that file the nail down gradually) are slower but more forgiving — you can stop in increments rather than committing to one snip. Some pets actually tolerate grinders better because the pressure feels different than the squeeze of a clipper. Let your pet guide which works best; if one method causes significant distress, try the other.
A practical session with clear nails looks like this: your dog is lying calmly on a non-slip mat. You can see the nail clearly and identify the pink quick. You trim the tip, leaving about 2mm of clearance before the quick. Your dog doesn't flinch. You move to the next nail. If you do nick the quick — and at some point, most owners do — styptic powder stops the bleeding quickly. It's worth keeping some in your kit.
Ear and Eye Care: The Details That Prevent Infection
Floppy-eared dogs trap moisture and debris in a way that upright-eared dogs don't, which makes them more susceptible to ear infections. Weekly cleaning with a vet-approved ear cleaner is generally recommended for these breeds. Cats rarely need routine ear cleaning unless you notice wax buildup or signs of ear mites — but it's still worth a look during each grooming session.
For ears: apply a small amount of cleaner to a cotton ball and wipe only what you can see. Don't use cotton swabs to probe deeper into the canal — you can damage the ear or push debris further in. For eyes: a damp, clean cloth to gently remove discharge at the corner of the eye is usually enough. Never use the same cloth on both eyes, and if there's significant discharge or redness, that's a call to the vet, not a grooming fix.
One of the practical benefits of regular at-home grooming is early detection. During a routine brush-and-check, you notice your dog's ear has an unfamiliar yeasty smell and the skin inside looks slightly red. You call your vet, catch a mild yeast infection before it progresses, and avoid both the discomfort of an untreated infection and a more expensive treatment later. That kind of catch is only possible if you're actually looking.
Managing Anxiety and Resistance: When Your Pet Fights Back
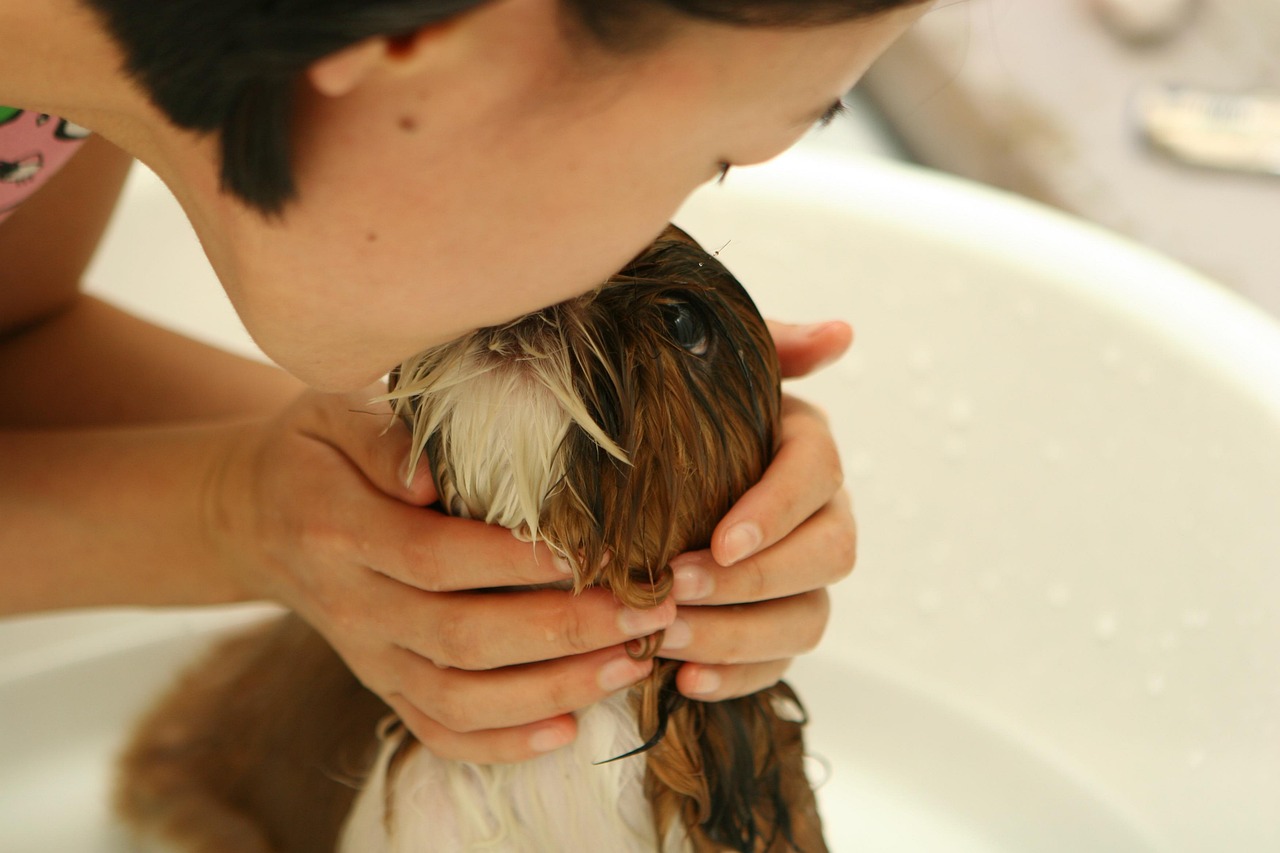
Some pets are genuinely anxious about being handled, and that's not a reflection of your technique or your relationship. Mild fussiness — shifting around, trying to walk off, batting at the brush — is normal and workable. Genuine fear responses — growling, biting, shaking, trying to escape with real urgency — are a different category and require a different approach.
For mild fussiness: keep sessions short, use high-value treats (not the everyday kibble kind — something genuinely exciting), take breaks when needed, and never push a restless pet through a full session out of stubbornness. The cause-and-effect is straightforward: if you force an anxious pet through a groom they're trying to escape, they will be more anxious and more resistant next time. Every forced session makes the next one harder.
Here's a simple way to think through your options. If your pet is mildly fussy but calms down once you start, keep working at home with short sessions and gradual exposure. If they're consistently agitated but manageable, consider a veterinary-recommended calming supplement or pheromone spray before grooming. If your pet is genuinely aggressive during grooming — snapping, biting, freezing in fear — a professional groomer experienced with anxious animals or a consultation with a vet behaviorist is the right next step. That's not giving up; it